Add (Component) Commands
Use these commands to add various types of components to a template.
Add components command helps to add the ability to create, attach and manage classification properties through the dialog.
In the world of BIM and domain specific exchange formats like iTwin and IFC, there is a need for a more standardized data format, one in which each object has a logical spatial structure that can be exchanged and understood by other third-party applications. This is the purpose of classification properties.
Classification of Components
Currently, the following classifications are supported.
- Roadway Plateau
- Traffic Lane
- Roadway
- Sidewalk
- Soft Shoulder
- Hard Shoulder
- Median
- Roadside
- Curb
- Course
- Surface Grade
- Pavement

The figure above shows a sample spatial breakdown of a roadway cross section using several of the classifications mentioned above.
In addition, there are a few additional categories of objects as given below:
Pavement- a pavement is considered to a contiguous set of closed components that represent any relatively flat hard surface and all the components underneath it. In the above diagram the sidewalk would be a pavement object. The roadway and all the components underneath would be another pavement, and the shoulder and all its sub-components would also be a pavement.
Surface Grade - any open mesh component that represents the top of the surface (e.g., grass or dirt areas)
Course- any relatively flat and shallow (high width/thickness) closed shape.
Creating Classification
To create classifications, follow the steps as given below.
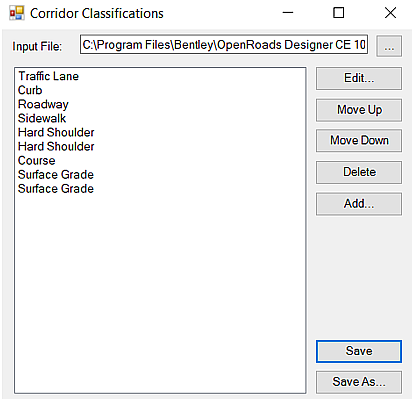
Here is where you setup rules that allow OpenRoads to automatically recognize what classification a component belongs to (e.g., Traffic Lane, Curb, etc.).
The rules in this list get applied in order from top to bottom, so the order of this list is important. Also note that there can be multiple rules attached to a single classification name.
A standard set of rules is delivered with the workspace and intended to work with corridor templates that are also shipped with the workspace. However, they may need to be modified for your custom templates.
To edit a particular rule, highlight the Classification and select the Edit button.
You are then given a set of filters that define the rule. These filters are intuitive, but the important thing is to define enough filters to make sure the particular object can be distinguished from other similar objects.
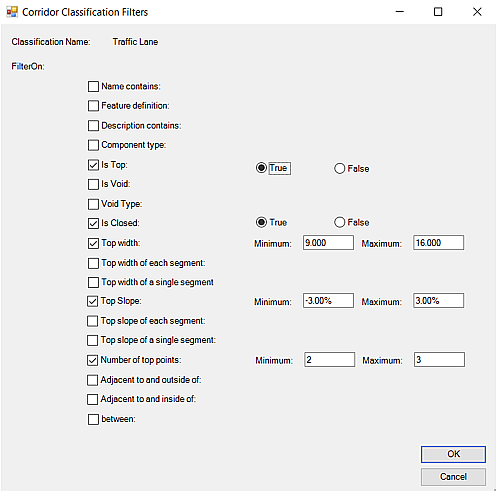
In the case shown above, any component that meets the enabled criteria will be considered a Traffic Lane.
- On Top
- Closed
- Falls within the given minimum and maximum width
- Falls within the given minimum and maximum slope
- Has either 2 or 3 top points
Once your rules are setup, you are ready to apply them.
Manually Add or Update Classification on a single component
To manually add classifications to a single component, double-click on a component to bring up the Component Properties dialog.
Click the Classifications button.
Select the Main Classification type, enable the appropriate toggles and click OK.
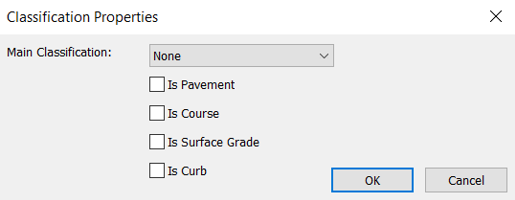
Classification properties are described below.
Is Pavement - Enable if this classification "Is Pavement".
Is Course - Enable if this component "Is Course" (a closed component below top surface).
Is Surface Grade - Enable if this component "Is Surface Grade" (belongs to the top surface).
Is Curb - Enable if this component "Is Curb".
Automatically Add or Update Classifications in a template
With the desired template selected, select Tools > Apply Classifications to Template.
The template will be interrogated per the Classification Rules and the proper classification will be assigned to each component.
Review the components of the template to ensure the Classifications were assigned appropriately.
Automatically Add or Update Classifications in all templates in a library
With the desired template selected, select Tools > Apply Classifications to Library.
Each template in the library will be interrogated per the Classification Rules and the proper classification will be assigned to each component.
Review the components of the templates to ensure the Classifications were assigned appropriately.